


Cyber security teams don’t always want to wait for an alert to know about malicious activity. By performing threat hunting tasks, security teams can be more proactive in identifying potential risks in their environment and reduce attacker dwell time. While analysts often leverage the visibility provided by their detection platform (e.g. EDR/XDR) for threat hunting, in the event an agent can’t be deployed – they have zero visibility.
This blog outlines how organizations can leverage the Cado Platform to perform forensic-level threat hunts across cloud resources, while ensuring zero impact.
Automating Scheduled Threat Hunts Across Cloud VMs
Having zero security visibility across top cloud assets is a huge challenge, as it’s common for organizations to operate instances that store sensitive data or perform business critical tasks that cannot be interrupted by an agent. However, the Cado platform takes a different approach. As the Cado solution does not require an agent to be deployed, customers can leverage out-of-box threat intelligence and detection capabilities (while also having the flexibility to apply their own custom threat intelligence) to perform regular threat assessments without worrying about potential down time.
Regular analysis can be initiated within the Cado platform user interface itself, but this process can also be fully automated via Application Programming Interface (API) to allow for greater speed and frequency.
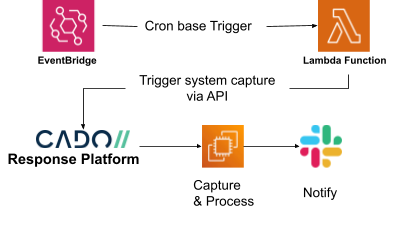
The below steps will walk through an example as to how customers can leverage Cado’s API together with AWS Lambda and EventBridge to automate regular threat hunts across cloud assets.
Step 1: Create the Lambda Function
AWS Lambda is a serverless, event-driven compute service that allows you to run code for virtually any type of application or backend service, without provisioning or managing servers.
The following code is used within a Lambda function to interact with the Cado API to create a project and initiate capture and processing of disks from virtual machines within a predefined list.
import logging
import osfrom requests.exceptions import ConnectionError, HTTPError, Timeout
from utils.api_utils import import_ec2_disks, new_project
from utils.consts import SYSTEMS_LIMITdef lambda_handler(event, context):
"""
"""
logging.basicConfig()
logging.getLogger().setLevel(logging.INFO)project_id = new_project()
logging.info(f'Created a new project (id: {project_id})')for i in range(1, SYSTEMS_LIMIT): # Acquire up to a limit
try:
system = json.loads(os.environ[f'SYSTEM{i}'])
logging.info(f'Acquiring: {system}')
except KeyError:
logging.info('Last system that was found')
breaklogging.info(f'About to try and import system: {system}')
try:
import_ec2_disks(instance_id=system['instanceid'], region=system['region'], project_id=project_id)except (ConnectionError, Timeout):
logging.error('Cannot access Cado Response')except HTTPError as e:
if e.response.status_code >= 400 and e.response.status_code <= 499:
logging.info('The request that was made was incorrect')
elif e.response.status_code > 500:
logging.error('A problem with Cado Response platform')
else:
logging.error()
logging.exception(e)except Exception as e:
logging.info('Unknown exception while importing instance')
logging.exception(e)return {'statusCode': 200, 'body': 'Scan complete'}
The full source code can be found in our GitHub repository.
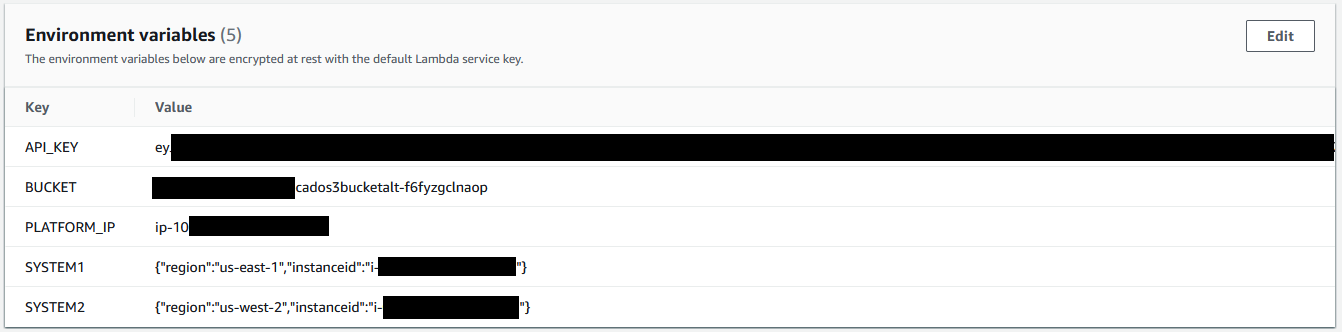
The Lambda function is written with Python v3.7 and is configured to use the following environment variables needed to interact with the Cado platform to perform disk capture from the designated systems.
API_KEY: <Cado Response API Key>
BUCKET: <Cado Response Bucket>
PLATFORM_IP: <Cado Response Platform’s Private IP DNS name>
SYSTEM1: '{"region":"us-east-1","instanceid":"i-0123456789abcdefg"}'
SYSTEM2: '{"region":"us-west-1","instanceid":"i-123456789abcdefg0"}'
Step 2: Create the Environment Variables
Environment variables are stored in the Lambda function under the Configurations > Environment variables tab.
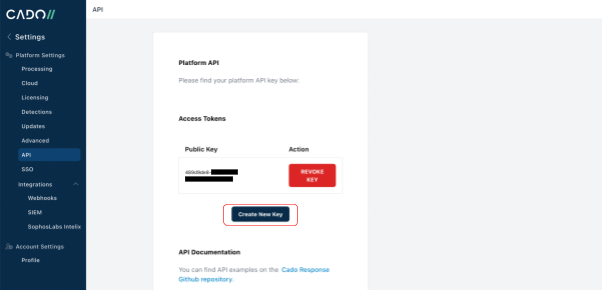
The API key can be generated in the Cado Response console by going to the Settings > API page and clicking on ‘Create New Key'.
The BUCKET and PLATFORM_IP details can be found in the output of the cloud formation template used to deploy the Cado Platform.
In addition to the environment variables, the Lambda function will also need network access to the Cado Platform which is done by connecting it to the Cado VPC under the Lambda’s configuration tab and selecting VPC.
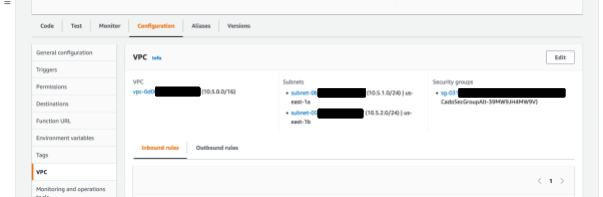
Note, Security Group rules for the VPC will need to be amended to allow communications between the Lambda function and the Cado API.
Step 3: Create a Cron Based Trigger
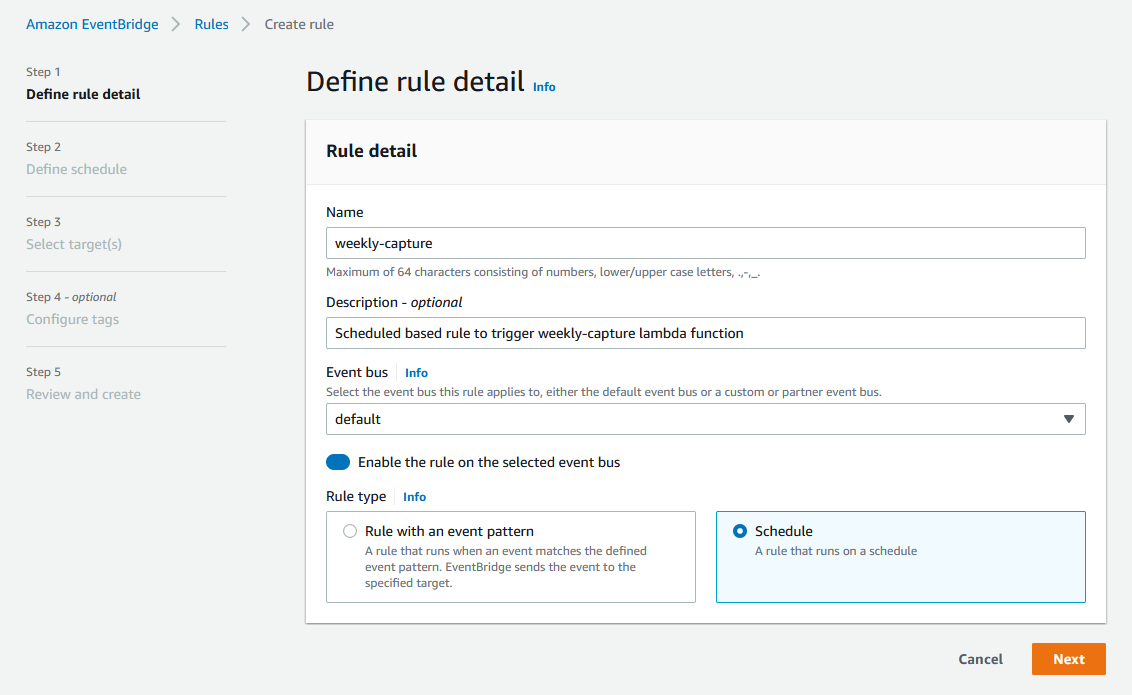
Now that we have deployed the Lambda function, the next step is to configure it to run on a scheduled basis. For that, we will use Amazon EventBridge, which is a serverless event bus that makes it easier to build event-driven applications at scale using events generated from your applications, or as we will soon see, scheduled rules.
Our Amazon EventBridge rule is configured to run as a scheduled based rule:
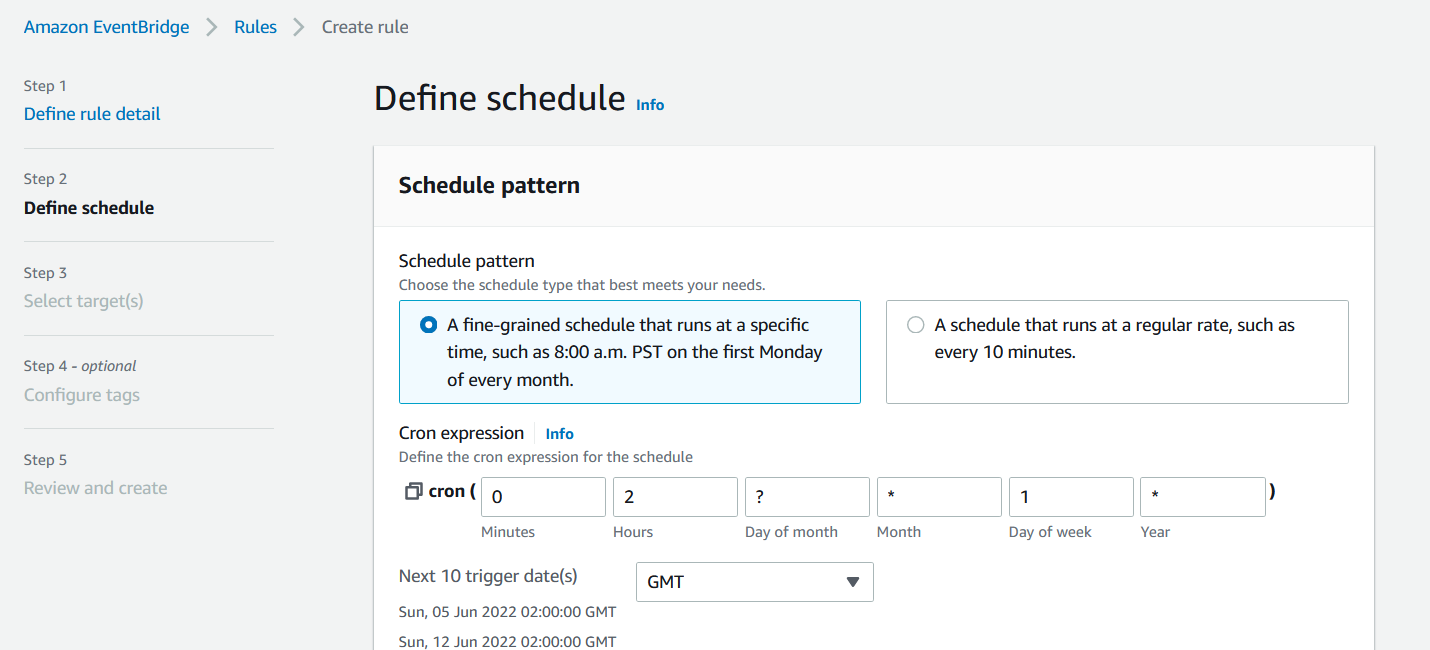
Amazon EventBridge schedule rules allow you to use a cron style expression to set the trigger periodicity, in our case we have it configured to trigger every Sunday morning at 02:00 GMT:
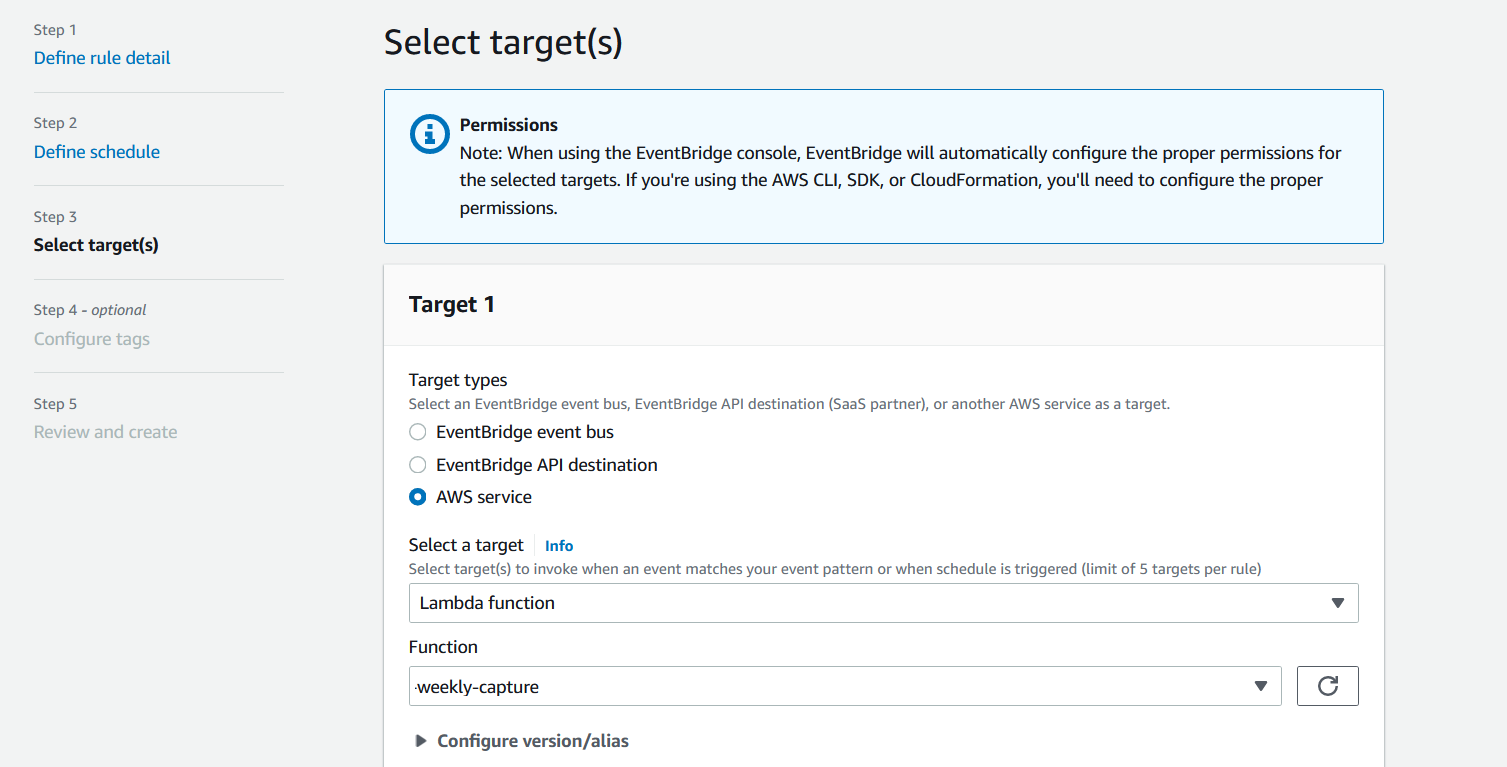
The next step is to link this with the AWS Lambda function as a target:
Step 4: Enable Notifications
We all know it's a case of "when" rather than "if" an incident has taken place, now that we have set up a scheduled scan for our critical systems, it won’t be too long until Cado surfaces malicious activity.
To ensure security teams are immediately notified of malicious activity, we can enable automatic notifications so that analysts can kick off a deeper-dive investigation without delay. This can be done by leveraging the Webhooks feature in the Cado platform. Cado can be configured to send automated notifications to systems including Teams, Slack and JIRA. Below we will demonstrate how to set up automated Slack notifications.
First, we need to set up “incoming webhooks” app in Slack, full instructions on the Slack docs website for setting up an incoming webhook can be found here. Once you have created an app with incoming webhooks, copy the Webhook URL to your clipboard.
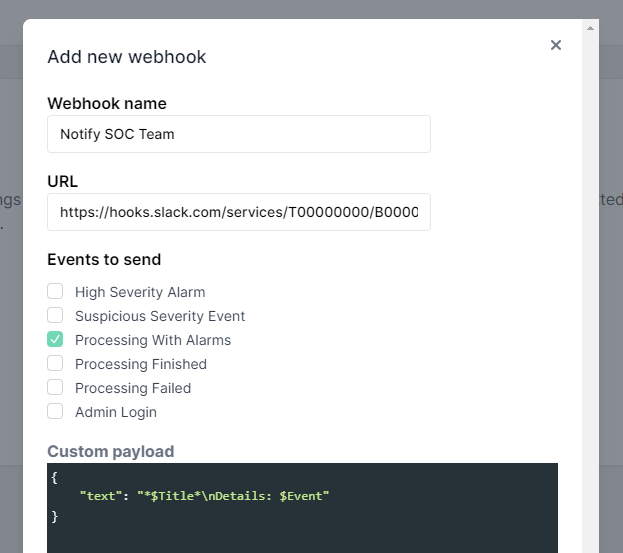
Then, log in to the Cado platform, and under Settings > Integrations > Webhooks select New webhook. Name your webhook and paste the URL from Slack. Then check “Processing With Alarms” under events to send, and finally, set the payload to the required format by Slack:
{"text": "$TitlenDetails: $Event"}
It should like like this:
Now that notifications are enabled, when Cado captures and processes a system and detects malicious activity the security team will get an immediate slack message that looks like this:

For more information on how to to set up webhooks in Cado, see our documentation.
If you're interested in automating incident response in cloud, container and serverless environments, contact us or check out our 14-day Free Trial.
Tag(s):
aws
More from the blog
View All PostsCado and Microsoft Defender - Streamlined Incident Response
September 30, 2024Continue Reading
Deciphering AWS GuardDuty Alerts: A Technical Guide
October 19, 2023Continue Reading
Cado + GPT-3: Interactive Incident Response
February 2, 2023Continue Reading